If you’re not yet able to complete a full pull-up, don’t worry. Assisted pull-ups are a great way to build strength and practise the movement before progressing to strict repetitions.
Assisted pull-ups using a machine
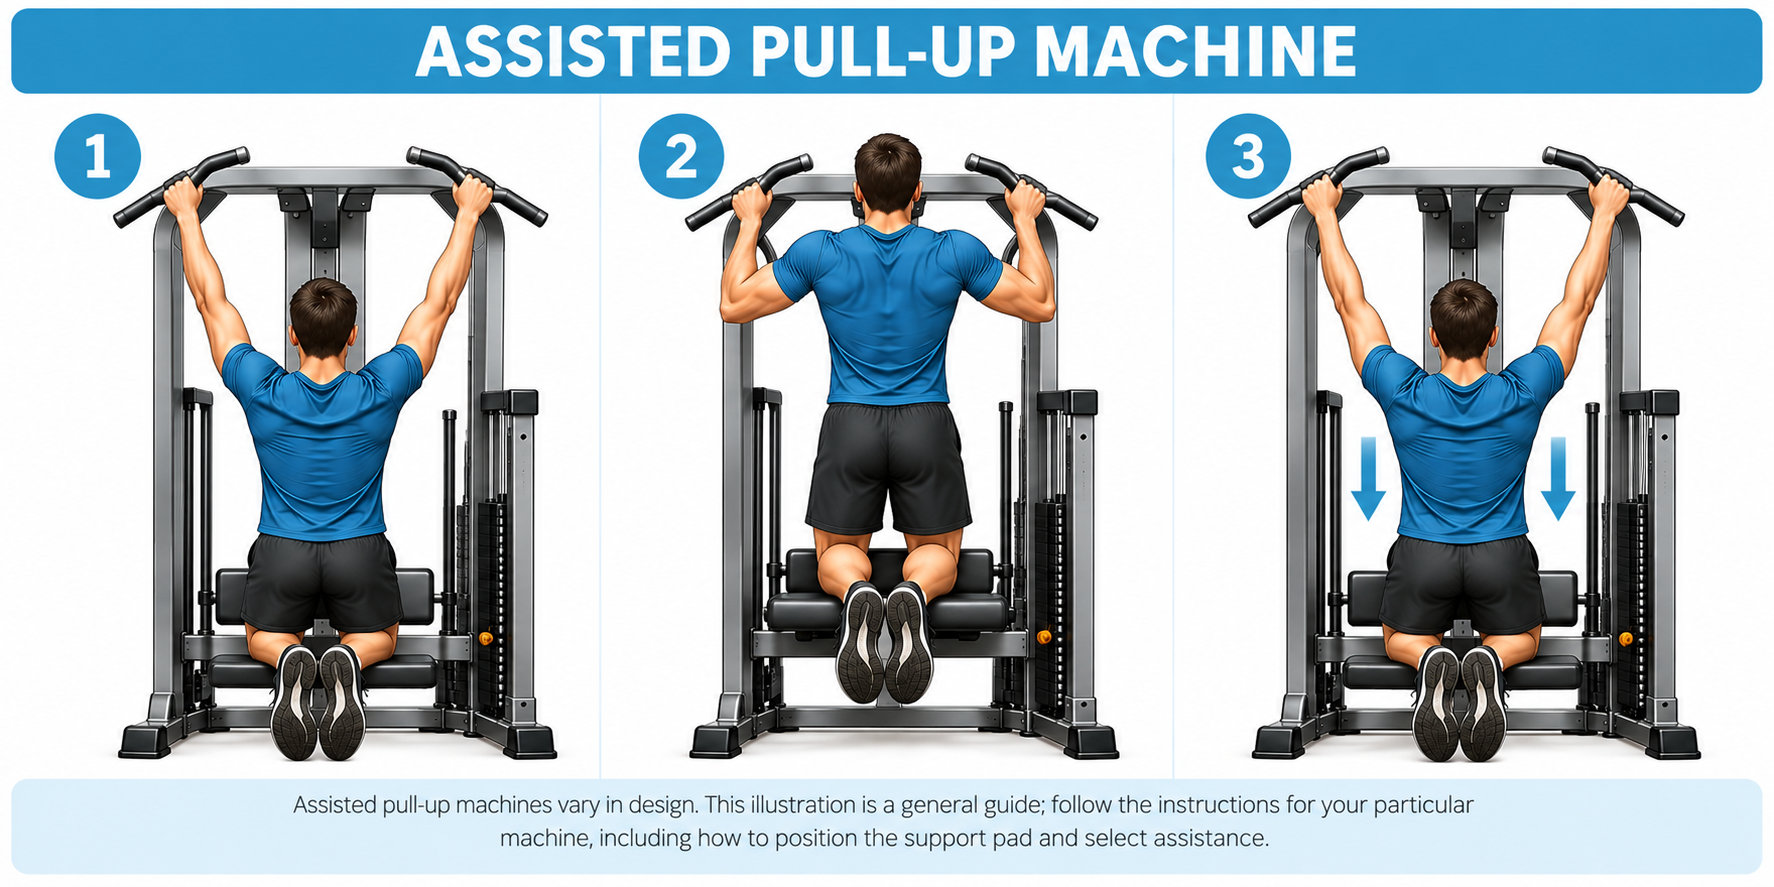
Step 1 — Set up
Assisted pull-up machines vary in design. This illustration is a general guide; follow the instructions for your particular machine, including how to position the support pad and select assistance.
Choose enough assistance to complete each repetition smoothly. On most assisted pull-up machines, a higher selected weight provides more help. Position your knees or feet on the support pad according to the machine instructions and take a comfortable overhand grip.
Step 2 — Pull up
Keep your body steady and pull yourself upward until your chin clears the bar. Avoid swinging or reaching forward with your neck.
Step 3 — Lower with control
Lower yourself slowly to the starting position. As you get stronger, gradually reduce the assistance without sacrificing good form.
Feet-supported pull-ups
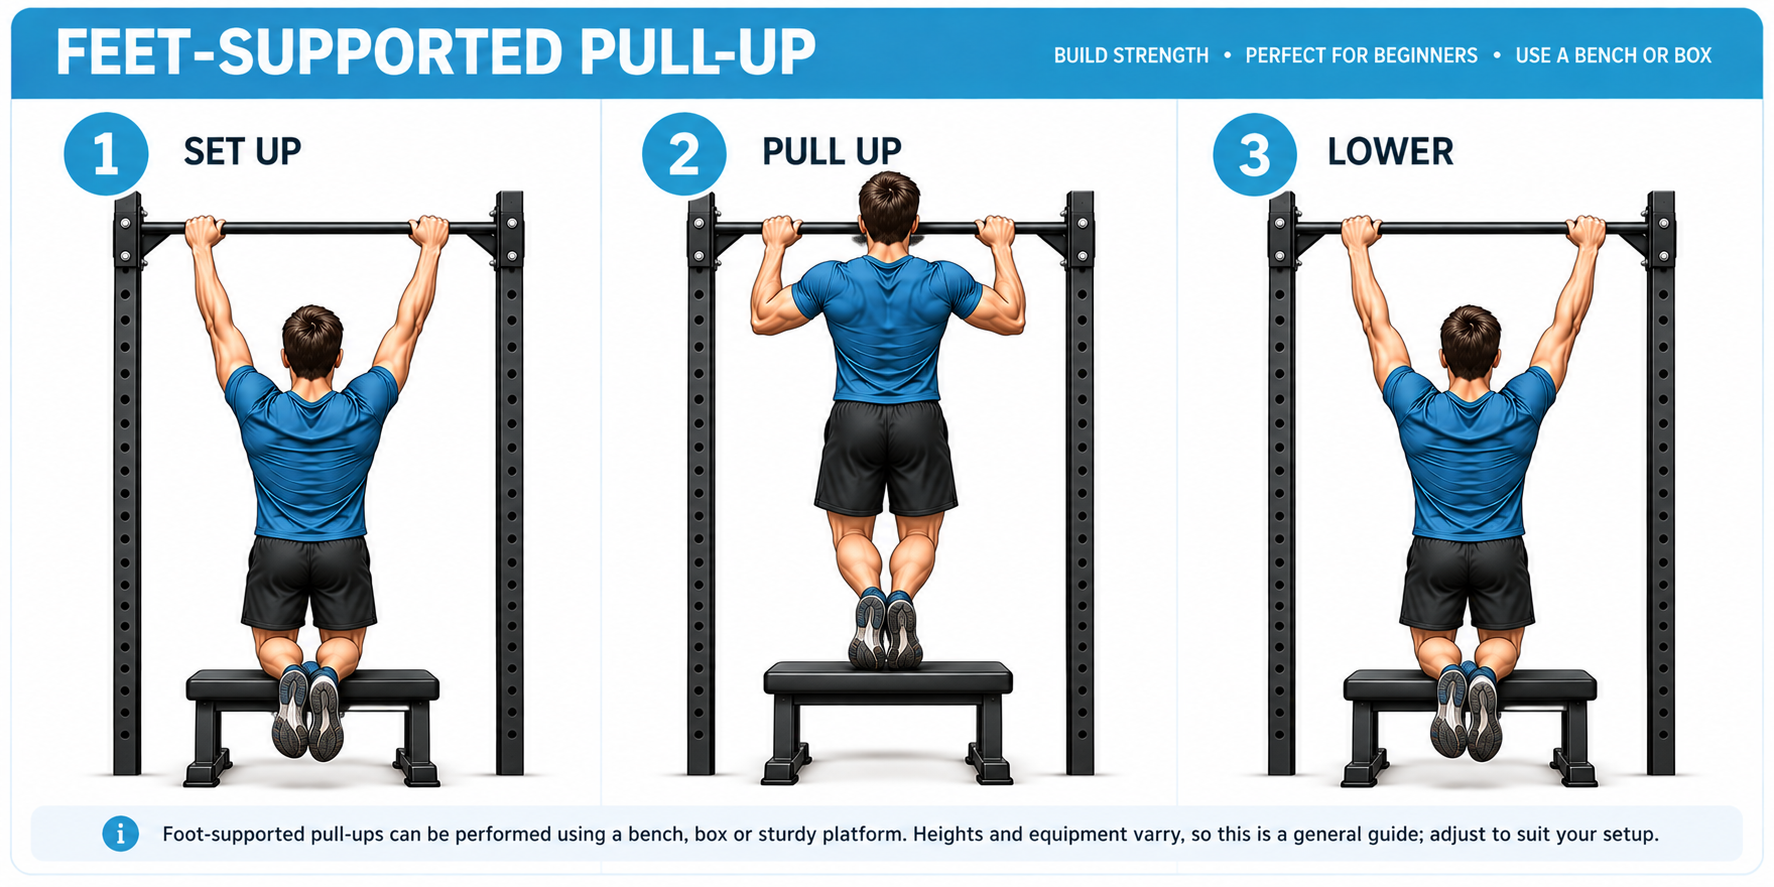
Step 1 — Set up
Use a secure, appropriately positioned low bar and stable foot support so your feet can stay supported throughout the exercise. Grip the bar with your palms facing away.
Step 2 — Pull up
Use your legs only as much as needed while pulling with your back and arms. Keep the movement steady and avoid pushing off explosively.
Step 3 — Lower with control
Lower slowly while keeping your feet supported. As you become stronger, use less assistance from your legs.
For extra practice, try controlled rows or short holds near the top of a pull-up, using a stable step to reach the starting position.
Resistance Band Assisted Pull-ups
A resistance band can provide assistance while you practise the same pulling movement. Choose a band designed for pull-up assistance and use only as much help as you need to move with control.
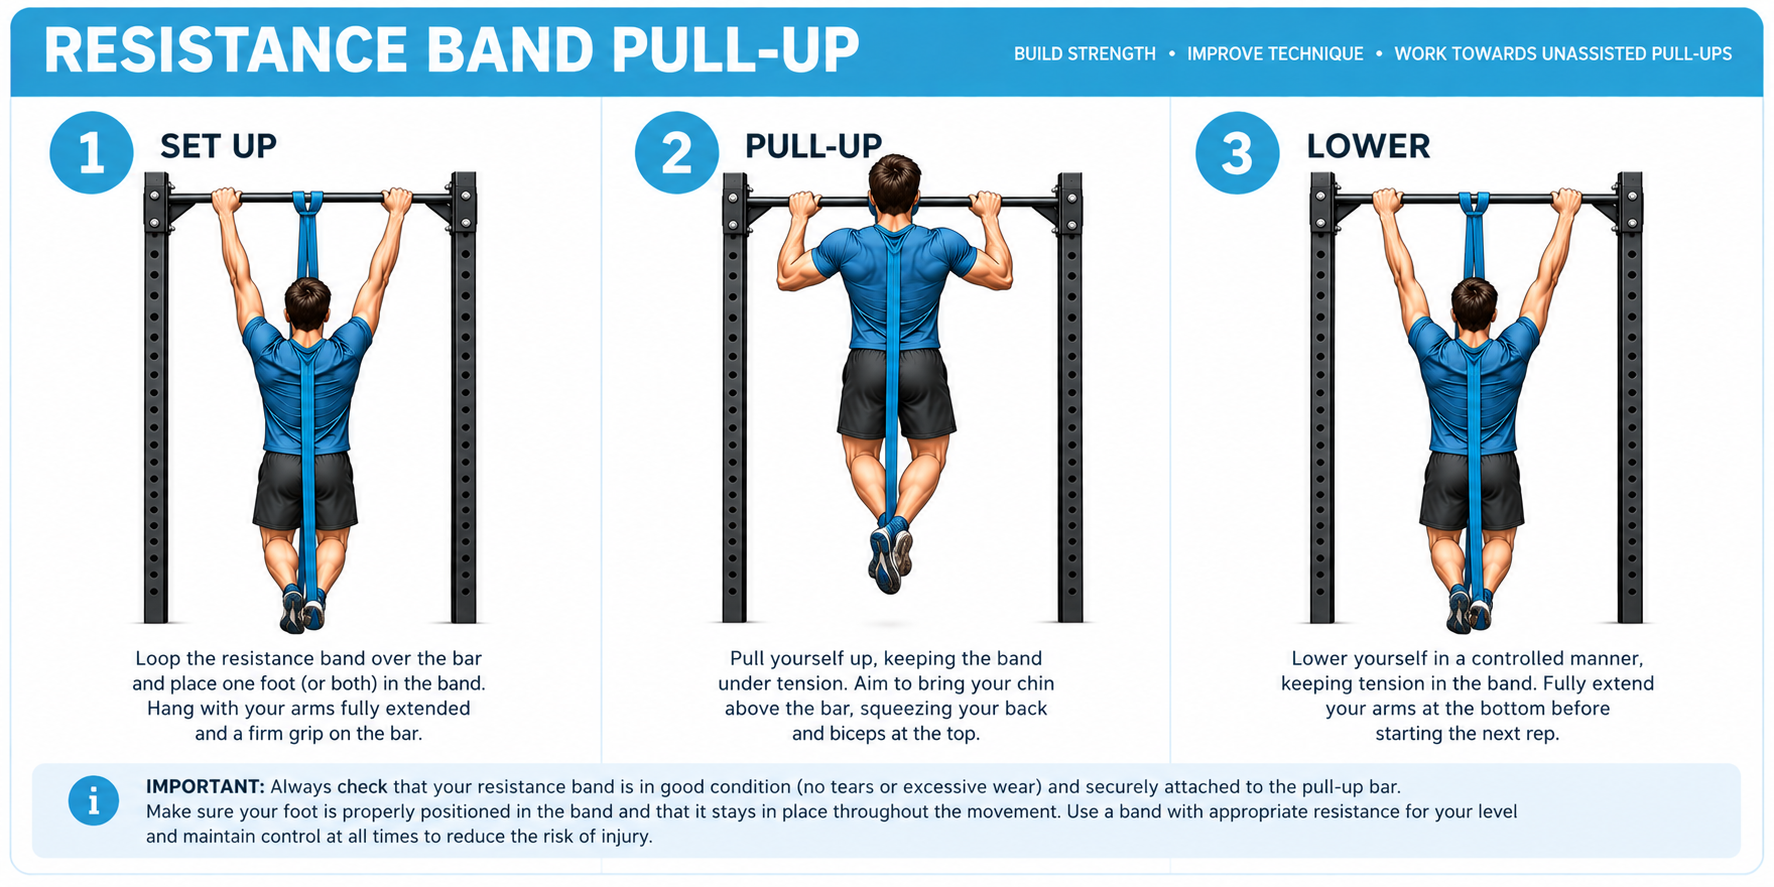
Safety note: Inspect the band for cracks, tears or wear before every session. Secure it to a suitable pull-up bar following the manufacturer’s instructions, position your foot carefully in the loop, and keep the band under control throughout the movement. Use a stable step to get into position rather than stretching the band toward your face. Stop if the band slips or the setup feels unstable. The illustration is a general guide; always follow your equipment’s instructions.
Step 1: Set up
Loop the band securely around the bar. With a firm overhand grip, carefully place one foot into the lower loop and extend your arms into a controlled starting position.
Step 2: Pull up
Pull your elbows down and bring your chin toward the bar, keeping your body steady. The band should assist the movement without bouncing or swinging.
Step 3: Lower slowly
Lower with control until your arms are extended again, keeping your foot securely in the band. Repeat only while you can maintain good form.
When should I try a full pull-up?
When assisted repetitions feel controlled and you’re using noticeably less help, try a single strict pull-up after warming up. Start with straight arms and engaged shoulders, pull without swinging, and lower yourself slowly. If you can’t complete one yet, return to assisted work and try again after another week or two.
Remember, there’s no need to rush. Consistent practice and good technique will serve you better than forcing repetitions. Stop if you experience shoulder or elbow pain.